8/23 第13回 Cloudfoundry輪読会で紹介されておりましたOpenShift Originを実際ローカル環境に構築してみました。
VirtualBoxを以下からダウンロードします。自分は『VirtualBox-4.2.16-86992-Win.exe』を利用しました。
https://www.virtualbox.org/wiki/Downloads
Vagrant 1.2.7をダウンロードします。
http://files.vagrantup.com/packages/7ec0ee1d00a916f80b109a298bab08e391945243/Vagrant_1.2.7.msi
次に、VirtualBox、Vagrantをインストールします。
OpenShift Brokers and Nodesを作るためのpuppetモジュールをgithubからダウンロード(クローン)
git clone git@github.com:openshift/puppet-openshift_origin.git
cd puppet-openshift_origin
自分の場合、以下でローカルポート使用していますとvagrant upが失敗するので、8080を880に変更。
config.vm.forward_port 80, 8080
仮想VMをいよいよ起動。初回だけは必要なソフトウェアのダウンロード等があるので、多少時間がかかりました。30分もかからなかったと思います。
vagrant up
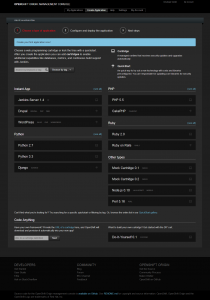
起動が成功したら、ブラウザから『https://127.0.0.1:8443/』でマネージメントコンソール画面が表示されればOK
Windows環境の場合、vargrant sshではvargrat に直接SSH接続ができない。コマンドプロンプトに表示されている情報からputty等のSSHターミナルから接続するようになります。putty用の公開鍵をputtygenから生成することが必要です。
C:\work\puppet-openshift_origin\test>vagrant ssh
`ssh` executable not found in any directories in the %PATH% variable. Is an
SSH client installed? Try installing Cygwin, MinGW or Git, all of which
contain an SSH client. Or use the PuTTY SSH client with the following
authentication information shown below:

Host: 127.0.0.1
Port: 2222
Username: vagrant
Private key: C:/Users/hiruta/.vagrant.d/insecure_private_key
vagrantを使うことでローカルにサーバー環境を構築することが簡単に行えます。サーバーを壊しても元に戻すことも可能なので、vagrantは開発環境を構築する場合には有用な方法になります。

